
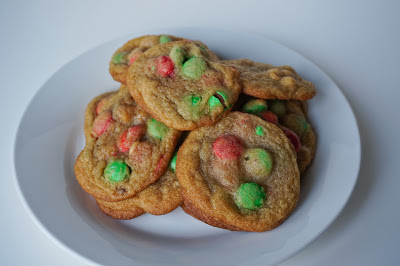
I whipped these up for my daughter’s birthday school treats since her birthday is so close to Christmas. I saw the peanut butter chips next to the m&m’s in the store and thought, hmmm…peanuts and m&m’s go together excellently so why not try it in a cookie? It worked excellently. The only thing I had to adjust was to add more flour to compensate for the peanut butter chips melting while baking. The first batch (before added flour) had a little gooey center from where they melted but the added flour fixed that. From the sounds I heard coming from my kids while they scarfed these down, I’d say they liked them. If you’re still trying to decide what to bring to your Christmas gathering, these are an easy crowd pleaser.
Ingredients:
1 tsp baking soda
1/2 tsp salt
2 sticks unsalted butter (1 cup), softened
2 eggs
1 1/2 cups packed light brown sugar
1 (10 oz) bag M&Ms Holiday Mini Baking Chips
1 (10 ounce) bag Reese’s Peanut Butter Baking Chips
Directions:
- If you’re making and baking these in one go, preheat your oven to 350 F.
- Combine the flour, baking soda, and salt in a small bowl and whisk to combine.
- In your electric mixer bowl beat together the softened butter and the brown sugar and mix it on medium high speed until it’s pale and fluffy (about 3 or so minutes).
- Then, add your eggs and beat into all is well combined.
- Now, add in the flour mixture and slowly mix it until it’s all just combined. (Don’t overmix or the dough gets too “doughy”.)
- Add your mini m&ms and peanut butter chips so they are distributed evenly throughout the dough. (At this point, if you’re not ready to bake, you can cover the mixer with plastic wrap and stick it in the fridge for a few hours. Here are some good tips about freezing cookie dough.)
- If you are ready to bake now, use a scoop spoon
or your hands to make the little cookie balls (my kids’ favorite part!). Place them on your cookie sheet about an inch or two apart. I usually use parchment paper or a round stoneware baking pan
.
- Stick them in oven for about 8 to 10 minutes. (I think my oven is on the brink because mine were done closer to 7:45 so watch them carefully. Once they start slightly browning at the edges it’s time to get them out our they’ll burn since they continue baking a little after you get them out.)
- Carefully use a flat spatula to transfer them to an oven rack. Set a thin tea towel over them to keep them soft.
- Once they’ve cooled, put them into a bag or container for storage…if you don’t eat them all right away!
(Photos courtesy: my awesome husband)


