It’s the post you have all been waiting for! Yes, even you Razak in Mozambique. I’ve shared glimpses here and there about the renovations and improvements we’ve done with our Office/Homework Room/Entry Way room and I’ve promised a full blog post of the whole project from the before and after. Your patience and dedication as you’ve waited has finally paid off!
I give you…
The Office/Homework Room/Entry Way Before & After Renovation Tour!
We’ll start with…
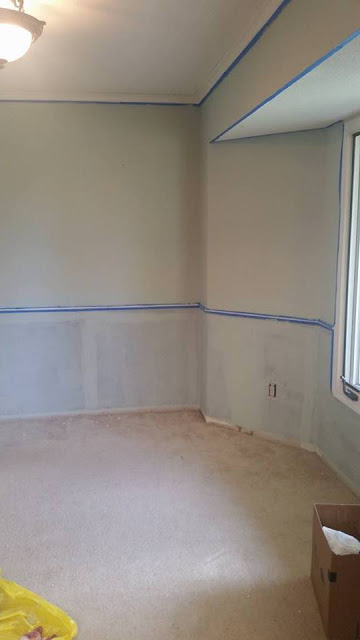
The BEFORE picture:
As you can see, it was practical enough I guess but very cluttered. I’m allergic to clutter so being in this room made me grumpy. And it’s the room where I help the kids with homework so it didn’t work very well.
Sometime towards the end of April, I said to my husband,
Husband, I’d like to make a few changes to this room now. Would that be ok with you?
Go for it.
And so I did…
New Paint Color
Before ripping the carpet out, since I didn’t care if it got stained, I gave the room a fresh coat (actually 2 coats) of new paint with my most favorite color – Sherwin Williams’s Copen Blue SW0068.
After painting our guest bathroom this color and loving it, I knew I wanted more of it in the house somewhere.
I spent a lot of time obsessing and deliberating about which color to use – and asking friends and family for advice – thank you! – and trying to decide if I should do one color on top and another on the bottom or keep it all the same.
I finally went with my mom’s advice (cuz mom’s know best, right?), and tried the same color on the whole wall and am so glad I did! I think it would have chopped the room up too much and made it look even smaller if I only did the new color below the chair rail.
I primed it first with primer tinted with the Copen Blue. Many, many thanks to my mother-in-law for coming over and helping me get the room all painted before having to pick kids up from school!
Carpet Removal
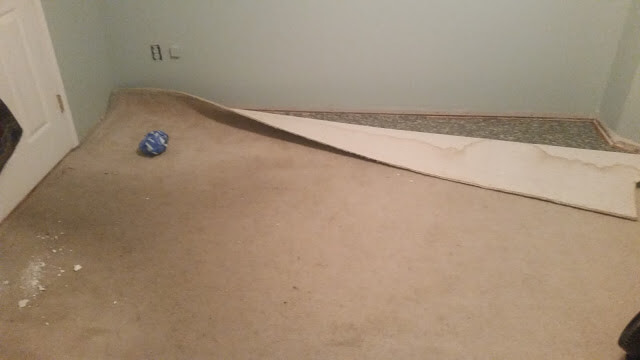
Next step, get rid of the horribly disgusting dirty carpet! This was my most favorite part, well after the new paint color. For a few years, I’ve been taking my sorrows and frustration out on that carpet. Poor thing became the scapegoat for all my problems.
The kids are squabbling again…and I hate this carpet!
No one’s listening to me to me today…and I hate this carpet!
It’s no wonder my Hulk counterpersonality hadn’t ripped the dang thing up earlier and ripped it all to shreds.
This room is the first one everyone walks into from the garage and up to our rooms so, being a high-traffic area, it was no surprise to see how dirty this thing got. My sweet husband tried appeasing me by spot treating the stains but after a while I couldn’t stand (on) it anymore.
Finally, on an evening in May, the day finally came! My husband and I ripped the carpet out the evening before we put the new floors in. It was a most satisfying feeling.
New Floor!
After ripping the carpet out, we put in new laminate wood flooring.
The previous owners had left a couple boxes of the BerryAlloc flooring throughout the rest of the main floor (except for this room and the living room carpet) and I was able to track down the same exact color at a local home improvement store.
I say “we’, but it was more like my amazing father-in-law and awesome husband who did it all in a weekend.
And it turned out so beautifully!
There’s no way my husband and I could have put the new floor in by ourselves. My husband’s dad is just one of those people who just knows the right way to do things like this – how to measure accurately, where to cut, how to jimmy things so they fit just right, how to “miter” things together, all while making it look like it was all done by a professional (or even better in my opinion!)
Desks
After the new paint and floor, I almost didn’t want to put anything in the room, it was so open and clean. How’s that for minimalism? I wanted to keep the room functional yet as clutter-free as possible. I knew this would be a challenge since the room serves multiple purposes – Entry Room, Office, Homework Room, etc.
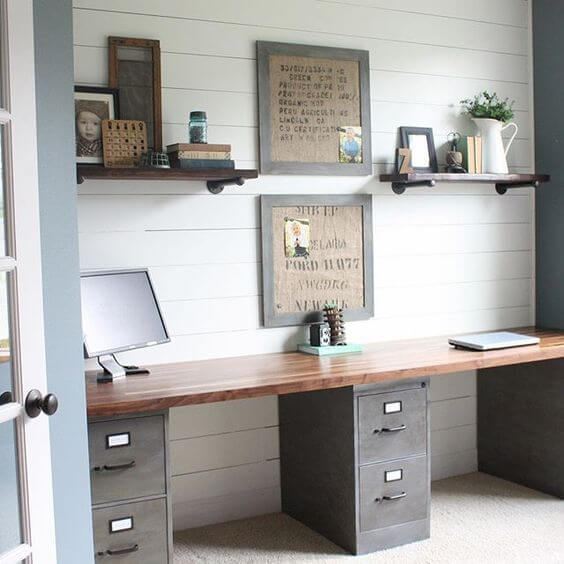
I saved a bunch of Office/Homework Room/ Entry Way room ideas to a Pinterest Board and really liked these ideas for one long desk along one wall like this one and this one:
I already have a desk I like so instead of making it exactly like those, I worked with what we had.
Who says a folding table isn’t a real desk?
For chairs, I wanted to find some cute antique-y white chairs or ones I could paint. One day, I took a trip over to our local Re-Store shop to see if I’d find anything for the room and I spotted these two white chairs!
I was so excited, I bee-lined it for the cashier and bought them before someone else could and what a great deal it was too.
They go so well with the room and desks!
Storage
As nice as it would be to only have those two desks in the room, the reality is that we do need to actually use the room. Next up, it was time to look for storage ideas. I knew I wanted something that the kids could access easily enough but that wasn’t just out in the open for younger kids to get into.
I had originally thought I’d like to do this:
As “chic” as that is, the reality is I’d constantly be picking pencils up and wiping marks off the wall because the kids wouldn’t appreciate the cuteness factor as much as the practicality factor.
After searching through garage sale furniture and antique/consignment stores for the “perfect” storage cabinet and not finding what I wanted, I went with this cube shelving and cube storage bins from Target:
I like how you can add a shelf insert to convert a cube into a drawer for better use of space.
While I didn’t do much with the floor, my three-year-old and I assembled the shelving unit all by ourselves! I was pretty proud of that.
I moved my other storage cart I’d used before over by my desk for “my stuff”. It’s not my favorite item in the room but it works and fits perfectly so I’m good with it for now.
Bulletin Board and Dry Erase Message/To-Do Boards
I’m a list maker. I have many lists – Google Calendar Reminder Lists, my phone’s Memo app, Evernote Lists, Trello Lists, and yes, even Paper Lists (gasp!). I know, it’s crazy and I’d like a more consolidated system but it’s what works for now. I also really like using Dry Erase Boards to jot down quick notes and then wipe them away when I’m done. But…let’s face it, the average Dry Erase Board is a little, well, ugly.
So after some more Pinspiration, I came up with this:
I’d like to find a simple Quote board to hang over the Dry Erase Board.
Made one for the Meal Menu/Grocery List while I was at it.
And a fun bulletin board.
I will write up separate posts for those projects with more details and how-to’s.
Hooks!
Next, we needed to add some hooks for hanging book bags, jackets, and mine and guests’ purses.
For the kids’ book bags and jackets, I searched and searched and bought and returned and finally I found the perfect board – in our storage shed in the backyard. 😉
I got the hooks at Hobby Lobby, painted it the same white as the trim and frames, and had my husband help me drill the hooks onto the board. It looks nice and empty now but come August and 4 backpacks and jackets/coats will hang from it.
Now this next piece is the one I’m the most proud of:
This is something I saw on Pinterest and actually did!
If you noticed in the before picture, there was a door leading into the Kitchen. So we took that off – which gave us much more space for the desks – and then my father-in-law helped me make the bench, we attached it to the door, drilled in the hooks and ta-da – an Entry Way Hook and Bench!
And there’s just enough space to store our library books baskets!
Accent Frames
Finally, it was time to add the accent finishing touches. Again, I wanted to keep the deco simple but still functional. My friend, Mary, helped me so much with this part and I’m so incredibly thankful!
I absolutely LOVE how it turned out!
I love how this frame turned out to display a special Mother’s Day gift from my daughter.
Of all the stuff I’ve kept over the years, personal cards from friends and family are my greatest treasures. I love receiving special notes in the mail but I also love pretty stationary. So I wanted to find a way to both display the pretty cards I’ve received and continue letting them encourage and inspire me and fill me with joy. I’ll post more about these ones too later. Using Pinspiration again, and Mary’s crafty guidance and frame, I came up with this:
People know I love pretty cards with birds and flowers. 🙂
And this for inspiration at my desk:
The After Picture
And finally, this wouldn’t be a Room Renovation post without a Before and After collage so here you go –
I started this project in May and finished at the end of June, not bad really! I’m super incredibly pleased with how it all turned out. Now I don’t hate coming into this room, it’s my new favorite room! I love coming in here, it makes me feel joyful and happy and a little bit proud with all we accomplished!


It looks fantastic! This was an exciting blog post! I love to see renovations happen (when I am not the one putting all of the work in ;))
Thanks, Mary! I enjoyed the project but I love seeing and living in the final project even more.
Wow! What a beautiful space! Love the colors and that hutch that you made is incredible! What a great piece!
Thanks Michelle!!
Oh I love it!! That is a really pretty color. and it goes very well with the floor. we just recently laid some pergo in our living room and it was quite a chore! horay for multiple opportunities to re-purpose stuff!
Thanks Michelle!! Yes, I’m glad that we found a good use for things.
Nice! I have laminate floor in most of the rooms at home, and I love them! They’re easy to clean, and it they were easily installed. Not to mention, it’s very affordable! Thanks so much for updating us!
I love the renovation. It feels good to see such good changes.
Don’t be cheap in hiring the right people to build your commercial building. It’s your commercial building and must be done in perfection on all angles.
commercial fitouts Mount Isa recently blogged…What does a commercial builder do?